
Level Up Your PowerPoint Presentations with FREE M365 Premium Creative Content
How to Enhance Your Presentations with Microsoft 365 Stock Images and AI-Powered Designer in PowerPoint
Microsoft 365 subscribers can enjoy the benefits of an expanding library of thousands of royalty-free multimedia resources, including images, icons, illustrations, videos, and much more. These valuable assets can be seamlessly integrated into documents, presentations, workbooks, and emails. Currently accessible within Microsoft 365 and SharePoint, with the promise of availability in more apps on the horizon.
Watch this video to see how to add FREE stock images, icons, stickers, cutout people, videos, and more to your presentations, documents, workbooks, and SharePoint in Microsoft 365. If you are a Microsoft 365 subscriber, you can use the premium images and other creative content within any Microsoft 365 app or SharePoint site. In this tutorial, we will look specifically at how to add this creative content from the Stock Image Library to your PowerPoint presentations and how to use the AI-driven Designer to elevate and refine your slides to a professional standard.
Here is a link to a Microsoft Support article on how you can use royalty-free Premium Creative Content in your materials.
See how to add stock images, icons, stickers, cutout people, videos, and more to your presentations, documents, workbooks, and SharePoint in Microsoft 365. If you are a Microsoft 365 subscriber, you can use the premium images and other creative content within any Microsoft 365 app or SharePoint site. In this video, we will look specifically at how to add this creative content from the Stock Image Library to your PowerPoint presentations and how to use the AI driven designer to enhance and level up your slides.
Step 1: Open Microsoft PowerPoint
Launch Microsoft PowerPoint and open your presentation or create a new one where you want to add visuals.
Step 2: Access the Stock Image Library
Click on the "Insert" tab in the PowerPoint ribbon.
From the drop-down menu, select "Pictures," and then click on "Stock Images."
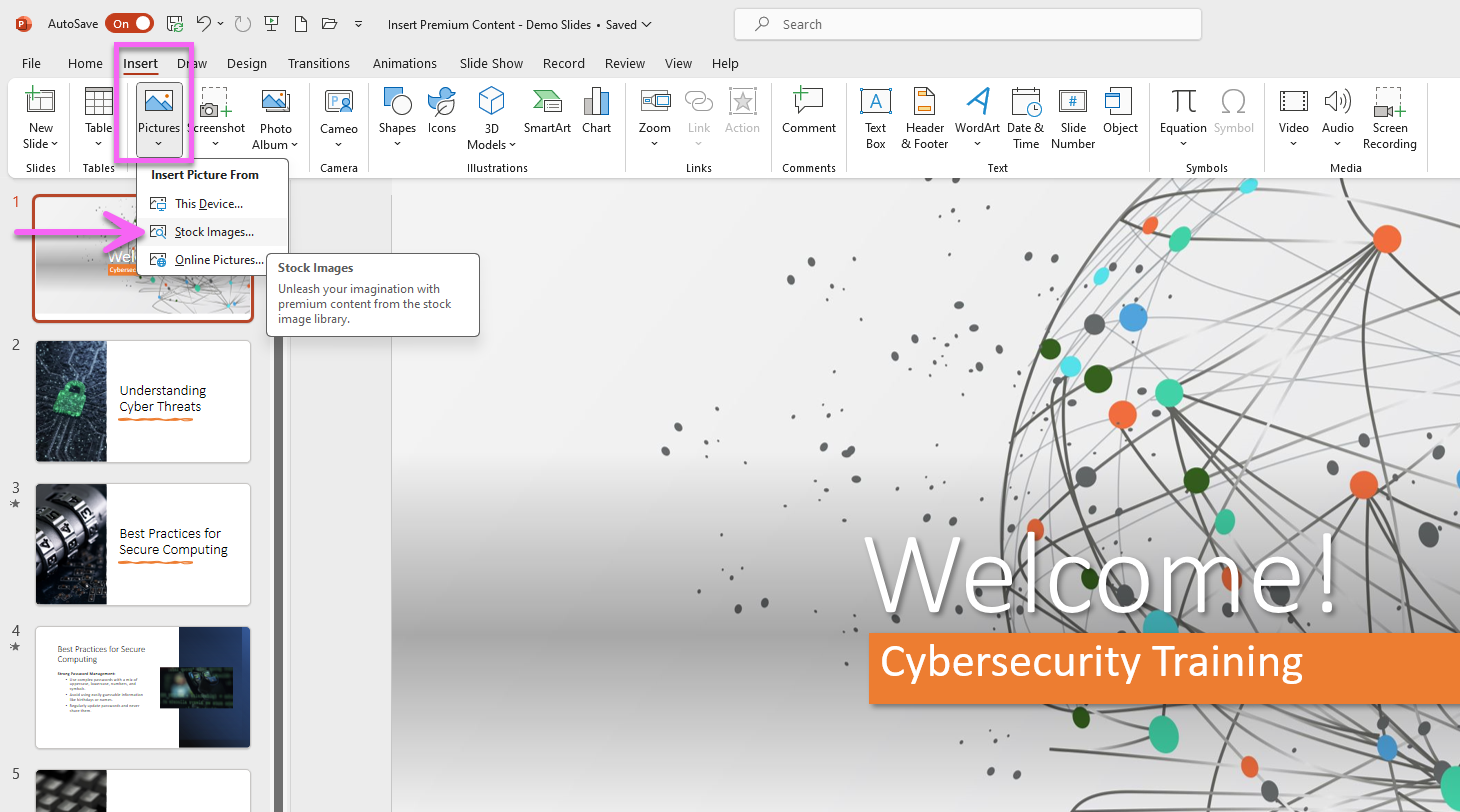
How to Access Microsoft 365 Stock Images and Premium Creative Content
Step 3: Explore the Stock Image Library
The Stock Image Library opens, revealing a wide array of multimedia resources.
Search for Content by entering keywords in the search bar. For example, type “Technology” in the search bar and press Enter.
Alternatively, you can explore content by browsing categories, such as icons, cutout people, stickers, video clips, illustrations, and cartoon people.
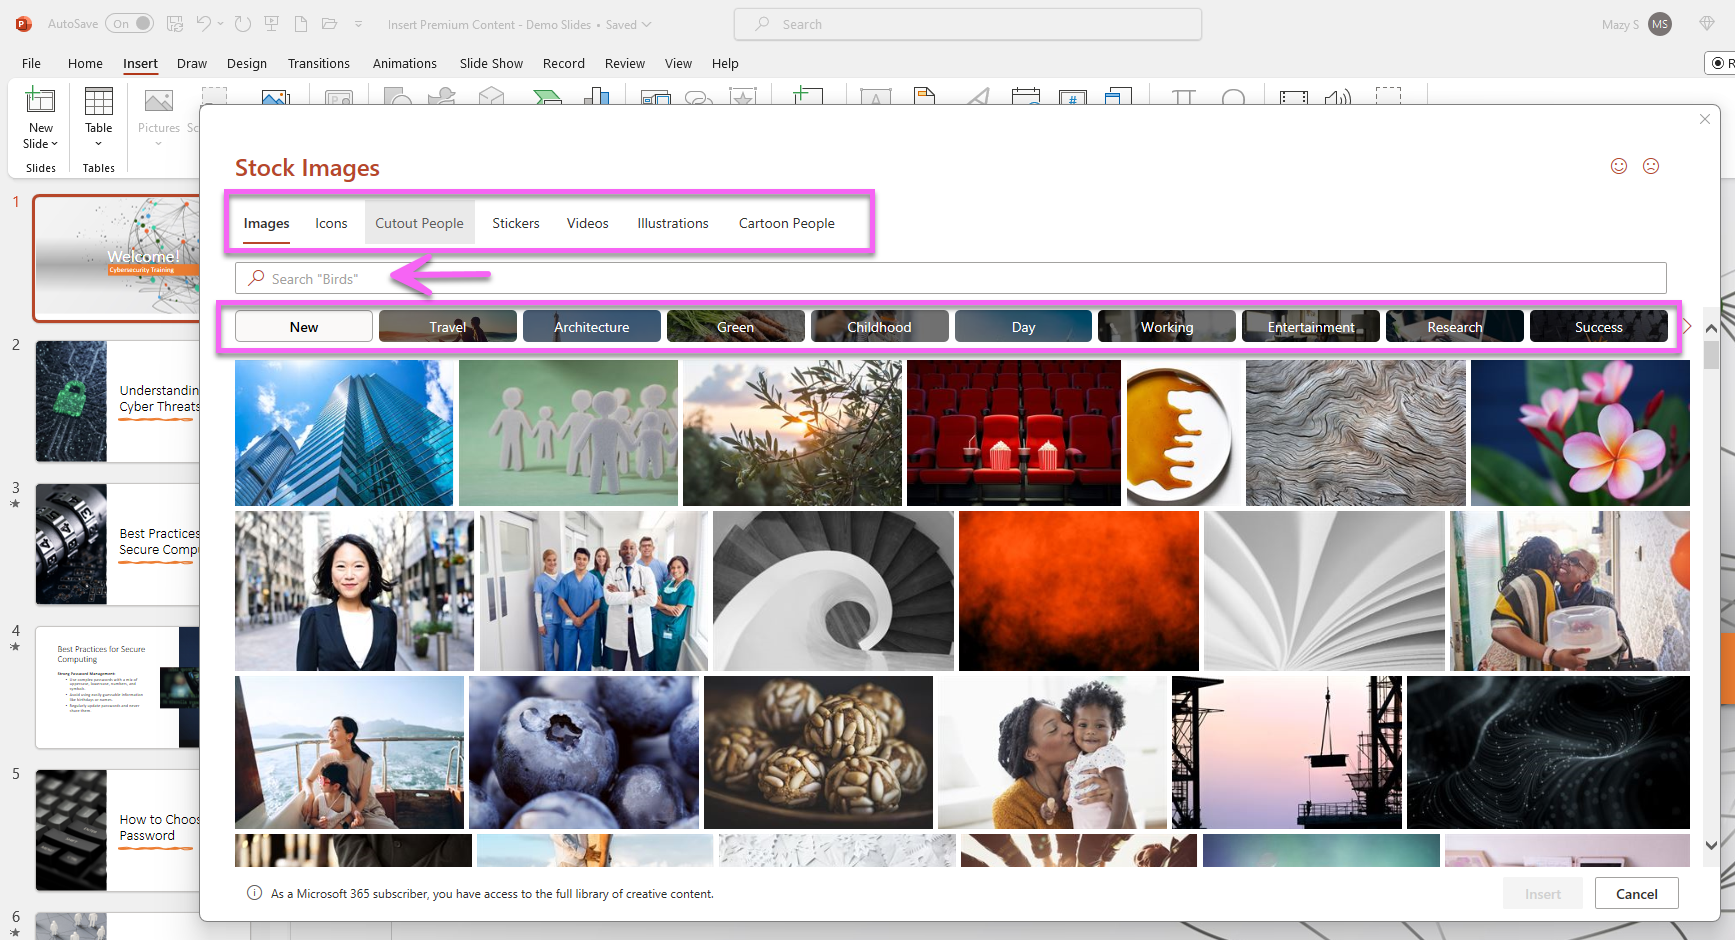
How to Search Microsoft 365 Stock Image Library
Step 4: Choose & Insert Your Assets
Select the images, icons, or video clips that fit your presentation's theme and message. Click on an asset to preview it.
Once you've found the perfect assets, click "Insert" to add them to your slide.

Microsoft 365 Stock Image Library
Step 5: Arrange and Customize
Drag and drop assets to your desired location on the slide.
If you're adding video clips, adjust the size and position of the video player on your slide.
Step 6: Utilize PowerPoint Designer
To fine-tune your slide's design, you can use PowerPoint Designer. If the Designer tab doesn't automatically appear, go to the "Design" tab and select "Designer."
Designer will suggest alternative slide designs and even generate images based on your slide content.
Save your presentation and start your slideshow to see the enhanced visuals in action.
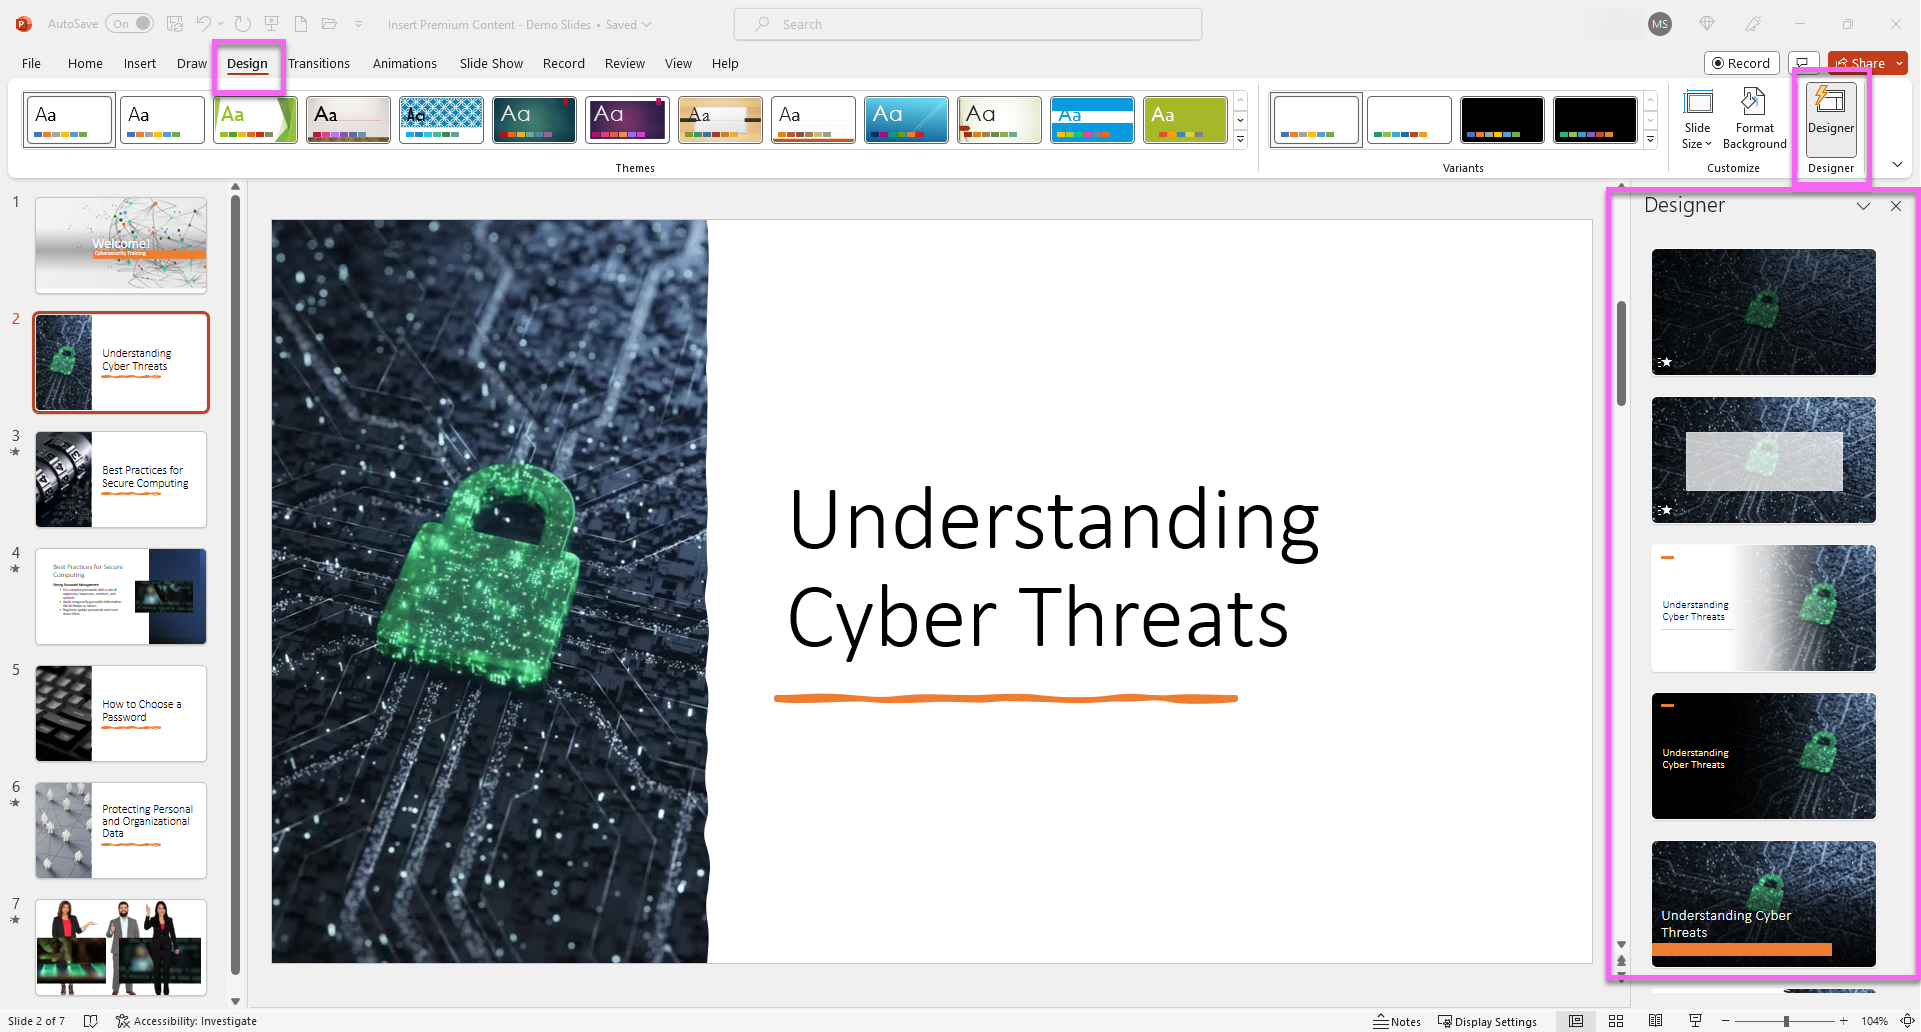
PowerPoint Slide with AI-powered Designer Engaged
That's it! You've successfully upgraded your presentations using Microsoft 365's Stock Image Library and PowerPoint Designer. Your slides will now be more engaging and professionally designed, impressing your audience and conveying your message effectively.
Don’t forget to check out the other step-by-step tutorials on my site!
We hope this guide has empowered you to take your presentations to the next level with Microsoft 365's rich content library. Happy presenting!